In my opinion, nothing looks sweeter on a baby girl than a dainty bishop-style smocked dress. Having recently been blessed with yet another grand-niece, I knew I had to get busy and construct her a daygown before too much time got away from me. The last one I made was a happy floral print, but this one I decided to make white, as cool as cool can be, and smock it with tiny rose buds.
I'm never quite sure what will interest people, but speaking for myself, I was very interested the first time I saw how a bishop-style dress is constructed. They are really easy to do since you do almost all the sewing before you do the smocking. Then, when the smocking is finished, you're almost done with the whole dress.
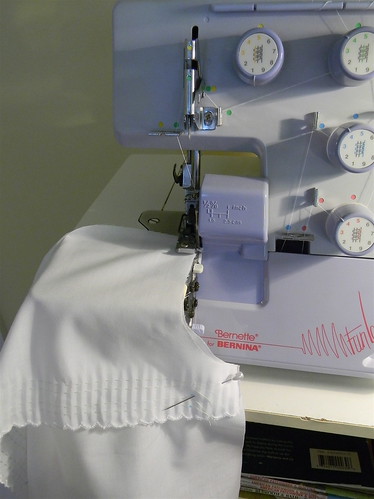
First you cut out the fronts, the back, and two sleeves. This photo shows where I was sewing a sleeve to the front of the dress with the serger. That way, I can achieve a tiny little seam which will easily go through the pleater. You can see at the bottom of the sleeve where I have already run the edge through the pleater. That part is done first, since I wanted a smocked sleeve. Then I follow this order of construction: dress back, sleeve, front, sleeve, back.
Thorougly confused??
Well, don't be. This next picture shows it much better than I can write it.
Only in this case, I'm actually making a dress that buttons up the front. So I sewed front, sleeve, back, sleeve, front.
Now you're allowed to be confused! :-/
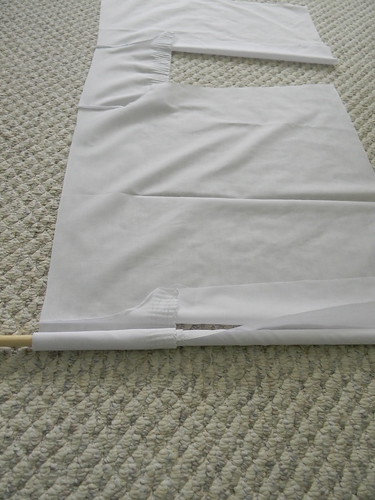
The next step is to roll up the dress. I lay it out on the floor, with the neck edge to the left, smooth it relatively flat, and then start rolling it up on a dowel rod, keeping the neck edge very straight.
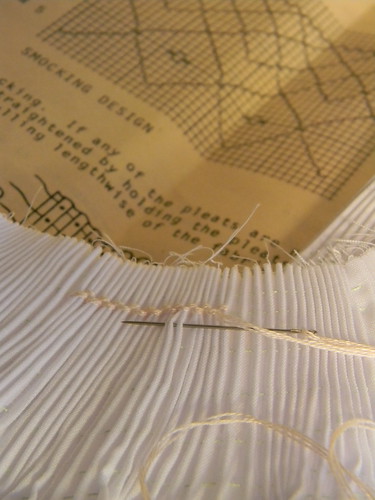
I take this whole thing to the pleater, having loaded it with the number of needles which correspond to the number of rows I want to smock. This tiny dress will only have five rows of smocking, so I have those five needles, plus one on either side, to stabilize it, for a total of seven.
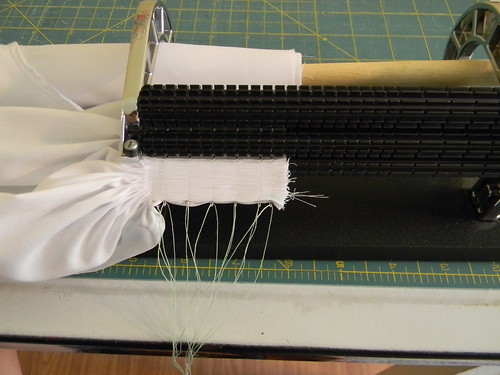
This little machine is just the coolest thing. It is also the best $85 I ever spent. If I stopped to count, like that would even be possible, I've probably used it to smock several hundred children's garments in the past 25 years. Anyway, it's so cool. Not automated at all, just fully mechanical, you turn the knob on the right hand side, and all these little gears just feed the fabric through, pleating it as you go. Whoever designed this was a genius.
When it comes out of the pleater, it looks like this:
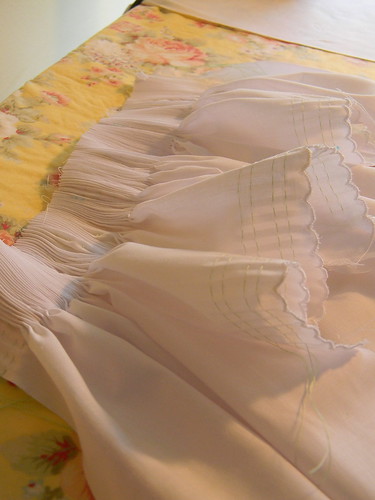
But, my goal, since we aren't constructing a turtle neck, is to fan it out it to look like this:
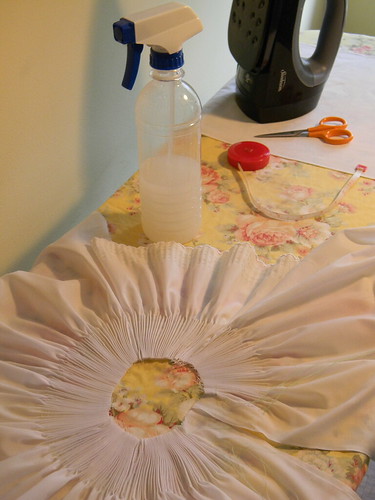
I measure the neck edge, per the pattern instructions, then tie off the top pleater thread to that measurement. Next I block it by spraying the living daylights out of it with spray starch, and steaming it like there is no tomorrow. I let all that dry, and I'm ready to start smocking!!
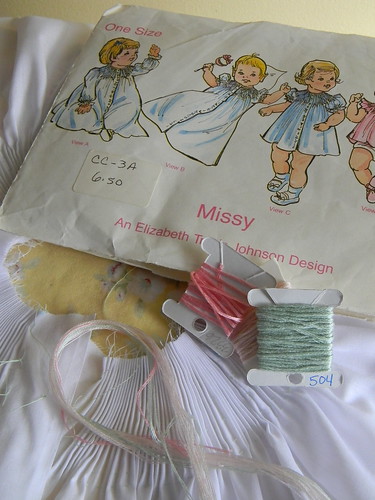
The pattern I'm using is precious. It's by Elizabeth Travis Johnson, called Missy. When the smocking is completed, a small amount of embroidery will be stitched down the front of the dress, between the seven buttons. So sweet!!
I actually have this all smocked now, and I'm busy finishing up the front details. Check back in the next couple days. I'll post pictures of Aly's sweet daygown.
Love,

1 comment:
Laura, even your ironing board is happy and beautiful. Please adopt me!
Monica
Post a Comment